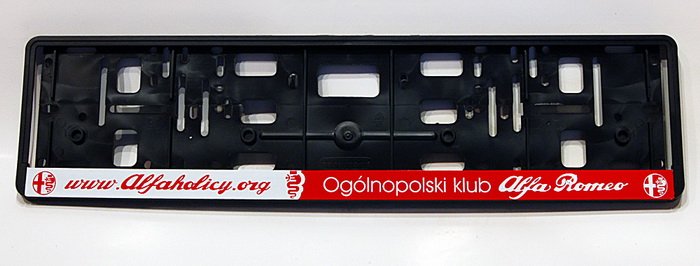
• Jeśli chcesz dodać swojej Alfie charakteru i jednocześnie zaznaczyć przynależność do naszej społeczności – to dobry moment, żeby je zamówić.

    Ramki Alfaholicy

    Szczegóły, zdjęcia oraz informacje o zamówieniu znajdziesz tutaj.

    Nie czekaj, bo jak zwykle schodzą szybko.

TomTom navigation installation

D

dwilk

Guest
I just bought a TomTom XXL2 navigation system - great price at Saturn - 490 PLN for the version with maps of 43 European countries. I was sitting and thinking how and where to install it and I came up with: the navigation will be glued to the inner side of the glove compartment lid, so that when opened it will be visible.

I was thinking of some guide rail + a small actuator (a tiny pneumatic one) to assist the opening. I have some model-making experience, so I can rig something up.

The question is else: where is the best to borrow power from and how to remove the upper glove compartment to access the wiring?
 
The closest power from the radio 'by the ignition key'. It’s easy to measure on the connector.
 
The closest power from the radio 'by the ignition key'. It’s easy to measure on the connector.
Well, I was thinking in that direction. And how to connect it effectively to have power output for USB? My 'handy' ideas include using the original TomTom cable and making a cigarette lighter socket (but as I write, that’s in the realm of wiring).
 
Anyway, it won’t be possible without some wiring hacks, but it could be neat wiring hacks. I’d look for a 12 V USB supply without the cigarette lighter plug, and if that isn’t possible, remove the cigarette lighter plug from either the original cable or an aftermarket one and connect directly to 12 V supply. But it’s better to keep the original if you want to take the nav to another car.
 
Last edited:
In the fuse box there’s a good place to hide an additional cigarette lighter socket connected to a fuse, e.g. F37 'Various Servizi receivers' (or 'Servicios'?). There I also wired in a CB. To that socket you connect the original TT power cable, route it under the dash to the glove box, and it’s OK. IMHO using the glove lid to mount the navigation is not a good solution. I tried it with a holder for my HTC HD2. The lid doesn’t stay vertical and it looks horribly large. It looks awful and I can’t imagine driving with the glove box open, even after mounting the nav by another method — with an additional spring-powered construction.

I ordered this mounting from Brodit for the navigation: http://www.haid-services.de/kfz-hal...oclip-gps-pda-und-handy-auto-halterung137.htm
 
Last edited:
On some kind of 'hinge' you would need to create a layout like in the factory display. Or perhaps use a actuator from e.g. a closed-loop system? The advantage of having the nav in the glove box is that you don’t have to pull it out to prevent theft.
 
On some kind of 'hinge' you would need to create a layout like in the factory display. Or perhaps use a actuator from e.g. a closed-loop system? The advantage of having the nav in the glove box is that you don’t have to pull it out to prevent theft.
Electric opening is too much luck... The盗 theft issue pushes me toward a glove box solution...
 
Agreed. In my opinion the glove box is a good idea, but it requires replacing the original lid with something that opens vertically and with a screen size comparable to the glove box dimensions. The TT in question is only 5".
 
The lid doesn’t necessarily have to open vertically; it could open forming a 'gap' proportional to the height of the nav, and the nav on the 'hinge' lifts from the glove box level to vertical.
 
I’ll tell you that this cubby is crying out to be adopted for the navigation system :)
It has a few basic advantages, it doesn’t obstruct with any everyday holder, there are no tire tracks on the front windshield from the sticker, it doesn’t scream to thieves where the lock/window cost far exceeds the navigation price.
We have the nav mounted all the time and it only takes one click and it works, whereas pulling it from the cubby - case - connecting power often ended with me not wanting to connect it, too much trouble.

I used for this a 5" Larka costing 199 PLN --> http://allegro.pl/lark-50-3-nawigacja-gps-5-mapy-uchwyt-lad-i1516278555.html
but now I would buy a new model http://allegro.pl/lark-50-5-hd-800x480-nawigacja-gps-odblokowana-i1499738820.html
With the software there obviously isn’t any problem and after a few minutes the navigation for 199 becomes priceless :)
Generally a 5-inch nav will fit I think any, but at purchase you should pay attention to weight, mine weighs about 190 g and unfortunately it’s already a bit too heavy,
which shows when going over unevenness the flap slowly closes, but don’t worry that’s also avoidable, I used a piece of rubber keyring which I put under the hinge and it’s OK.
Of course you can change-stretch the spring in the flap but that’s when it’s warmer.

1.jpg2.jpg5.jpg3.jpg6.jpg4.jpg

I forgot to mention that I mounted the charger in the hole where the fuses are, I connected to the exposed wires for powering the alarm with quick disconnects (scalpels) and in the circuit I added a switch which I placed under the steering wheel, there is a piece of soft plastic in which you can safely drill because it’s easy to pull out.
 
Last edited:
Alright a spring on the axis of rotation of the navigation + the force of the spring lifting the flap should stiffen the construction sufficiently. I just measured the cubby. 7" - 8" would be optimal. Galaxy Pad 9" would probably be too big - won’t fit in the recess, but would best camouflage the monstrous flap when opened.

@TOM&JULIA take a photo of how it looks on your end.http://www.forum.alfaholicy.org/uzytkownik/12642.html
 
Last edited:
You can mount something larger but unfortunately the flap won’t close, 5" is the max probably unless we completely modify the cubby

@TOM&JULIA take a photo of how it looks on your end.
but what do you mean? the above photos are mine
 
Last edited:
I forgot to mention that I mounted the charger in the hole where the fuses are, I connected to the exposed wires for powering the alarm with quick-disconnects (scalpels) and in the circuit I added a switch which I placed under the steering wheel, there is a piece of soft plastic where you can safely drill because you can pull it out without a problem.

How did you get the wires from the fuses to the cubby, because I see the cable neatly comes out through the cubby hinge...
 
The cubby is held on by two screws under a rubber washer, gently pull up and the cubby is removed, after pulling out there’s a fairly large hole through which you can see the radio, you just need to aim well and the little wire will come out near the steering wheel.
 
The flap looks quite roughed up :(
You’re right to notice but that’s just how it looks, the photo was taken in dim light with a lamp - the top was sprayed with paint and it’s now oiled a bit, in real life it looks perfect.
1.jpg2.jpg3.jpg
 
The cable is pulled, Tom&Julia, thanks again, I’d probably be figuring out for two days how to remove the cubby. Now the plan is to borrow power and install a cigarette lighter socket.
You wrote that you wired into the alarm, I understand you don’t have the alarm, right? For me that fuse box looks quite solid, I’m not sure how to tackle it...
 
I wired into the exposed fuse for the alarm installed by the dealership visible in the photo,
I marked with circles where you can connect the positive, and roughly as the arrow indicates there is a screw attached to ground where you can connect the negative.
But this method requires a switch because it would constantly charge, my switch is also visible.
1.jpg
 
I’d be careful with the positive in the photo, because that’s the main power for the body computer. It’s probably protected in the engine bay by one of the maxifuses (those big fuses), but if you have a short it will leave the car completely immobilized and the fire risk is higher (note that the wiring looms are wrapped here and there as they rub). The voltage on it is always on (that’s why it was used as a power source for the alarm). It’s better to connect behind a fuse for less critical circuits and 'on the ignition' like radio, cigarette lighter, etc.
 
Last edited:
Amortyzatory
Back
Top